In this project, you will learn how to make your own encryption program using Python (that is an interpreted programming language for general-purpose programming) to send and receive secret messages with a friend.
In this project you will also learn programming concepts like:
- Iteration (looping) over a string variable;
- The find() method;
- The modulus operator (%) division reminder.
- for loops;
Before getting on to successfully complete this tutorial in a Microsoft Windows Operating System, you must do the following:
1.- Download and install the Visual Studio Code for Windows.
2.- Install a version of Python 3 (for which this tutorial is written), download from python.org
3.- Install the extension from the VS Code marketplace
4.- Make sure the location of your Python interpreter is included in your PATH environment variable. You can check this by typing path at the command prompt (you should see this folder included in the path C:\Program Files (x86)\Python36-32). If the Python interpreter's folder is not included:
4.1.- Open Windows Settings, search for "environment"
4.2.- Select Edit environment variables for your account
4.3.- then edit the Path variable to include that folder (C:\Program Files (x86)\Python36-32).
Step 1 - Understanding the Caesar cipher method or algorithm for performing encryption or decryption of a message.
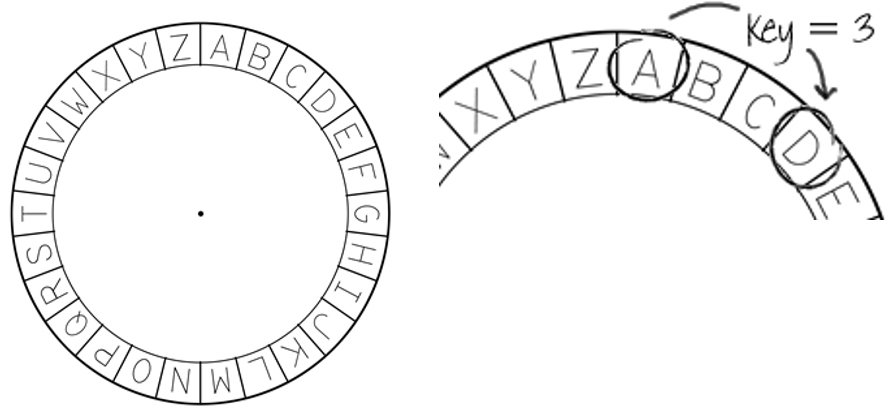
The Caesar cipher is one of the oldest and simplest forms of encrypting a message and its name come from Julius Caesar, who was a emperor of the Roman Republic Empire.
A cipher is a type of secret code, where each letter in the original message (called the plaintext) is replaced with a letter corresponding to a certain number of letters shifted up or down (key) in the alphabet.
Let’s start by encrypting the letter 'A' using a right shift of 3 as the key (but you can use any number you like), so that (for example) each occurrence of A in the plaintext becomes D.
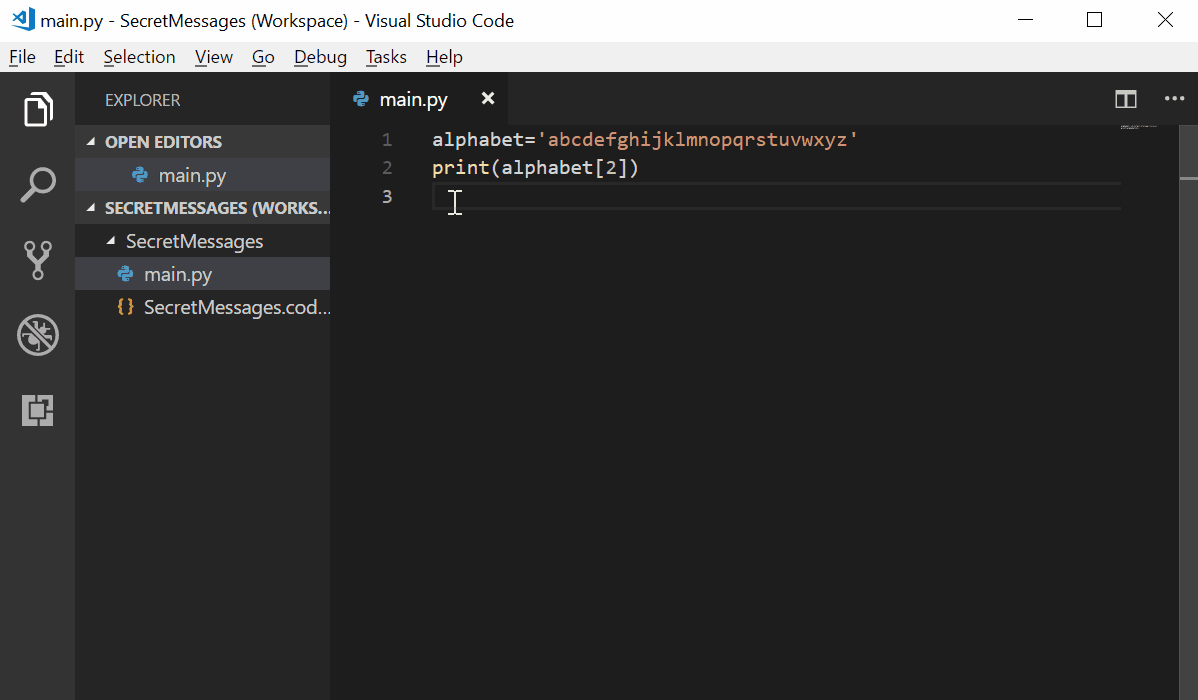
Create a file in Visual Studio Code, name it 'main.py' and write it out as an alphabet variable.

Keep in mind that each letter of the alphabet has a specific position within the alphabet, starting at position 0. So the letter ‘a’ is at position 0 of the alphabet, ‘b’ is at position 1, ‘c’ is at position 2 and so on.

Let's see how we can get a specific letter from your variable alphabet, for example, if you want to "extract" the letter 'c' write below the declaration of the alphabet variable the following code :
print(alphabet[2])It should look more or less like this:

Now it is time to know what those two lines are doing.
It is simple to run 'main.py' with Python: right-click in the editor and select Run Python File in Terminal (which saves the file automatically ;) ):
Add the following lines to your code:
print(alphabet[8])
print(alphabet[0])
print(alphabet[14])
What is it the output? (You can delete the print statements once you have tried this out)
At this point you have learned how to work with an array (the values that store the variable alphabet) and extract the value that you want to use from it. Therefore, the next step to encrypt your message is to choose and configure the key you will need to encrypt your messages. For doing that, you will need to store the secret key in a variable as well:
alphabet='abcdefghijklmnopqrstuvwxyz'
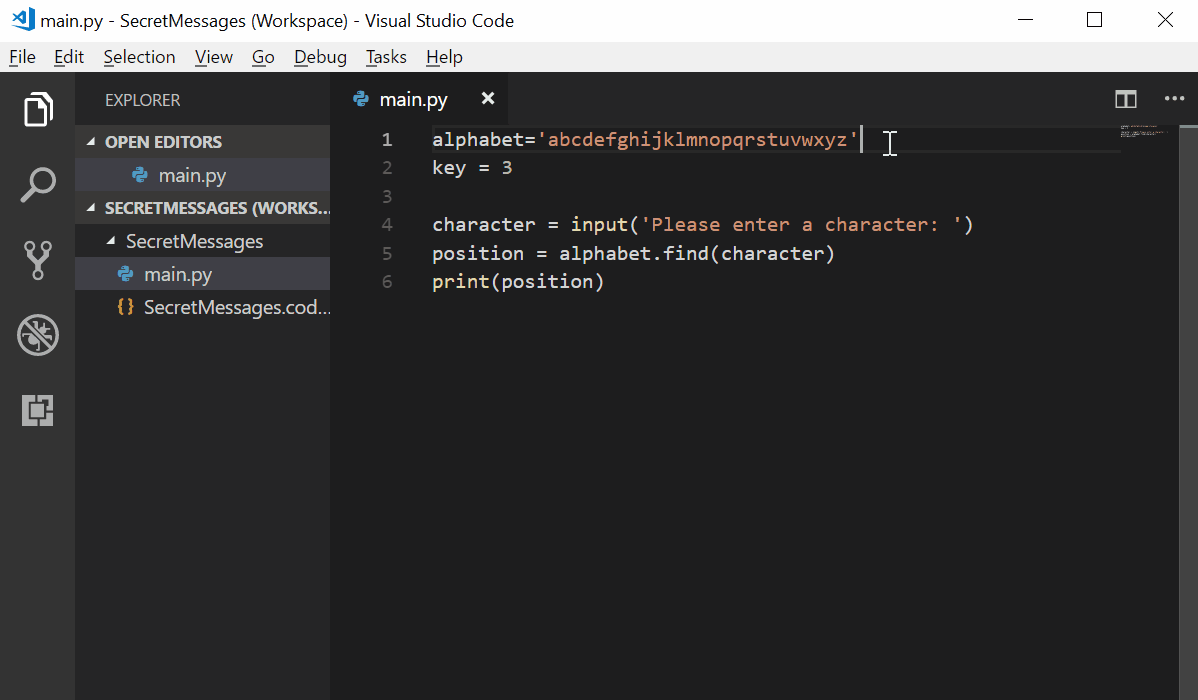
key = 3Now you are ready to make your first program to encrypt a letter, adding the following lines to your code.
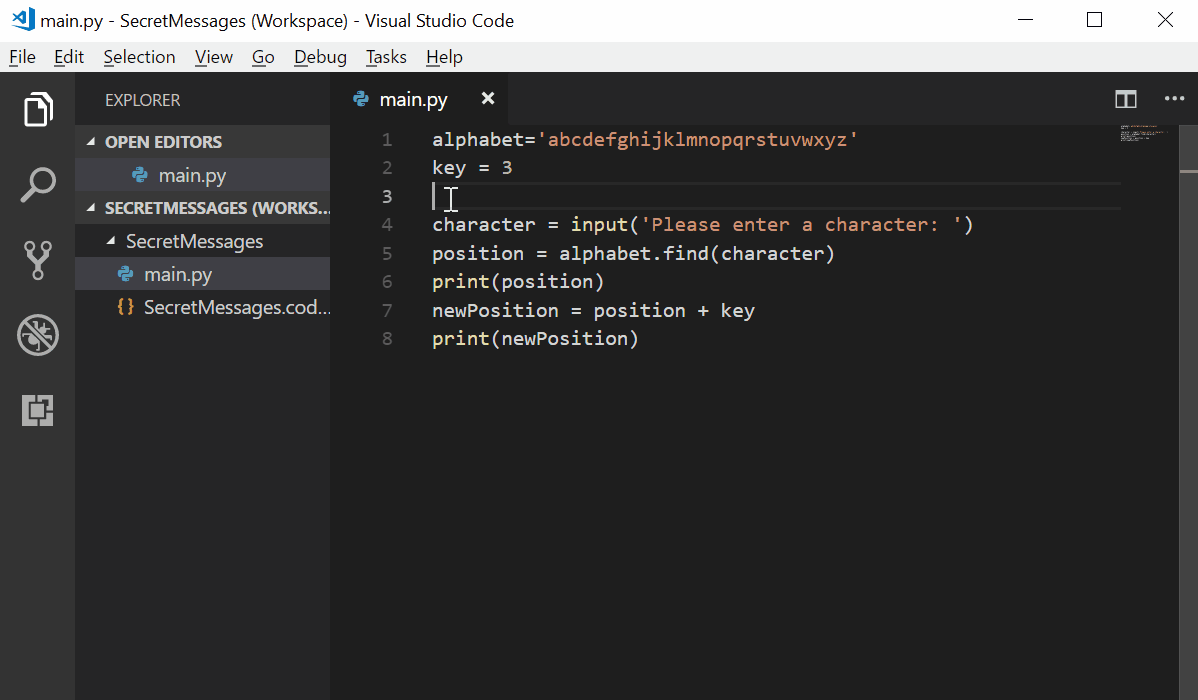
The following line is used to request to the person that is using the program (called user) to enter a character (single letter):
character = input('Please enter a character: ')Then you have to calculate the position of that character using the method find and then you can print it in the screen to know its value, just as shown below:
position = alphabet.find(character)
print(position)
In the following example, the user is entering the character ‘e’ and the program is showing the position 4 as a result of the program's execution:
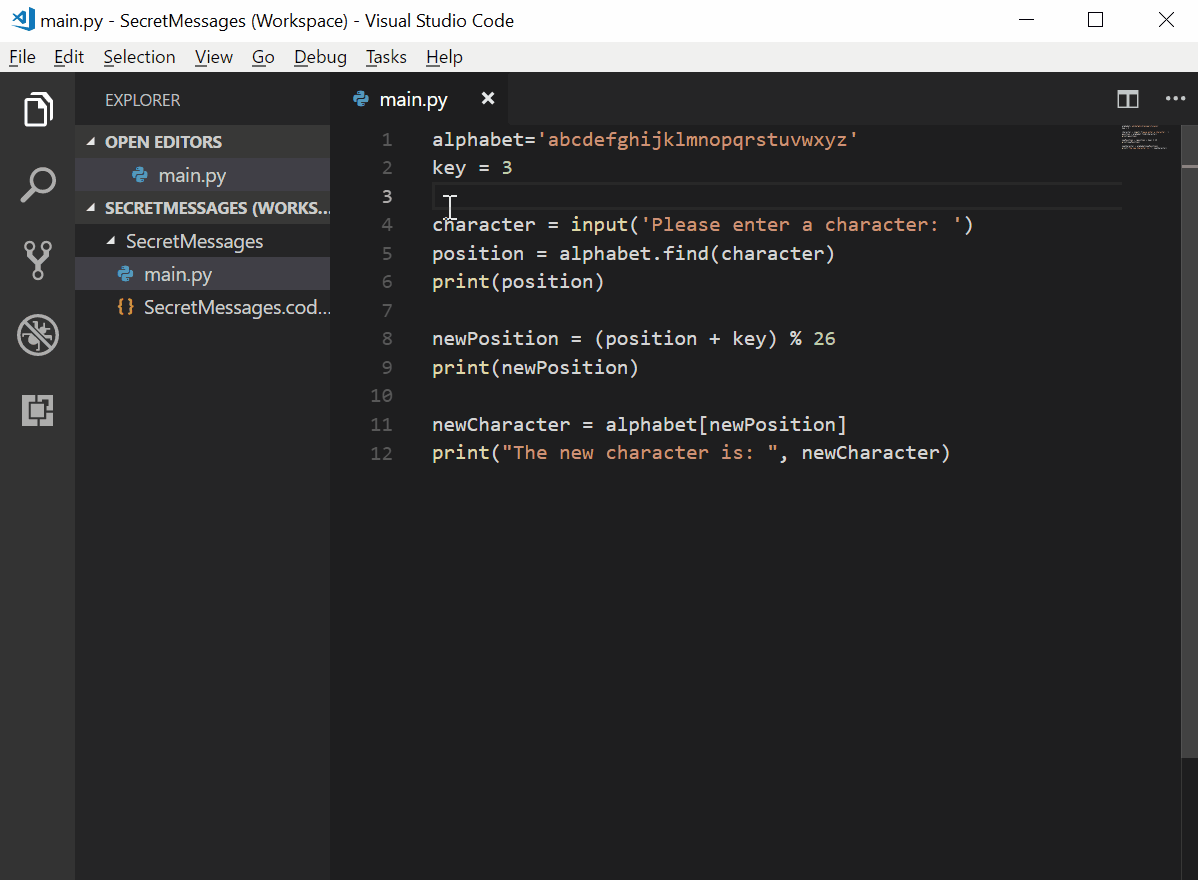
Now that you know the position of the original character (letter) to encrypt it, you should add the key (in this example its value is 3) to that position creating a new variable (newPosition) to store the position of the encrypted character.
newPosition = position + key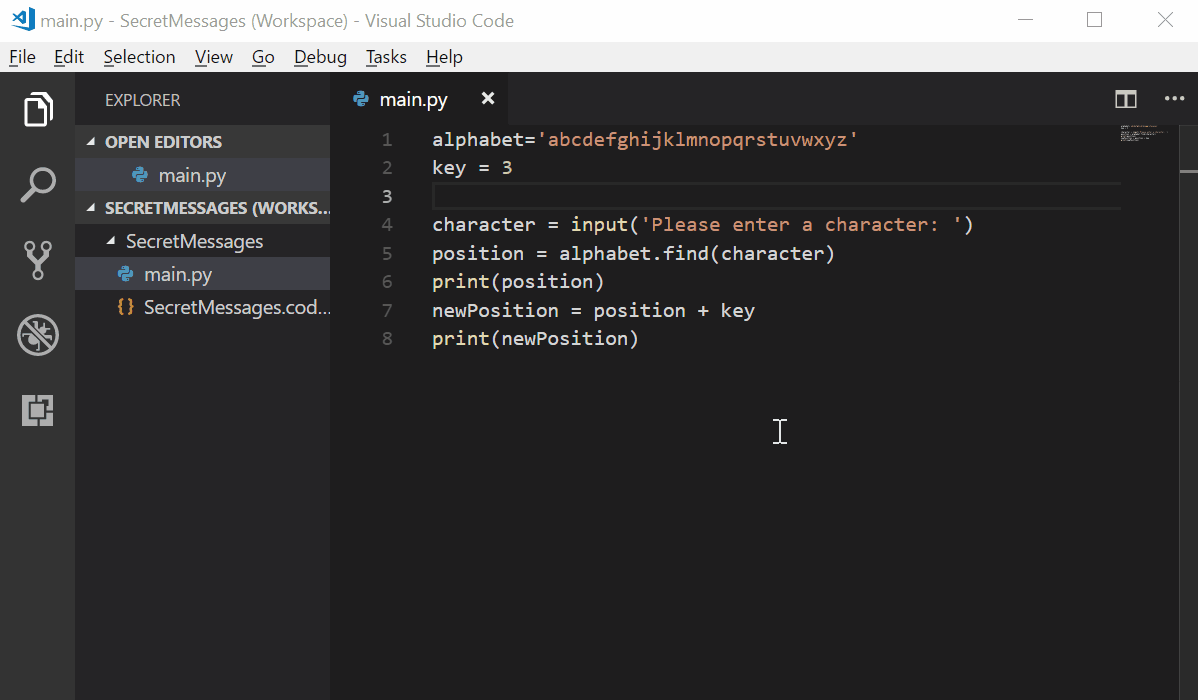
In the example above, letter ‘e’ is at position 4. To encrypt it, you add the key (3), giving 7 as the new position that will be used to encrypt the character (that correspond to the letter ‘h’). But what happens when you try to get the new position of the letter ‘z’?
Notice how the newPosition is 28 but there are not 28 letters in the alphabet!. To sort it out you can use a % (modulus) to tell the new position to go back to position 0 once it gets to position 26.
alphabet='abcdefghijklmnopqrstuvwxyz'
key = 3

character = input('Please enter a character: ')
position = alphabet.find(character)
print(position)
newPosition = (position + key) % 26
print(newPosition)
Now you are almost there yuhu!! :).
The last thing that needs to be done is to replace the original character with the new character that has to be associated with the value of the new position. You have to create and add a new variable to your code. To do that and to make it simple you will call this new variable newCharacter.
newCharacter = alphabet[newPosition]
print("The new character is:", newCharacter)
Let's see what your program is doing!
It is almost ready, well done! :).
The user (or your friend in this case) should not know the position of the characters. For this purpose you can now remove some of your print statements and just leave the print of the new character at the end of the code. What line numbers do you need to delete to achieve this?
Now that you know how encryption works, it is time to encrypt a entire message using Python. So let's do it!
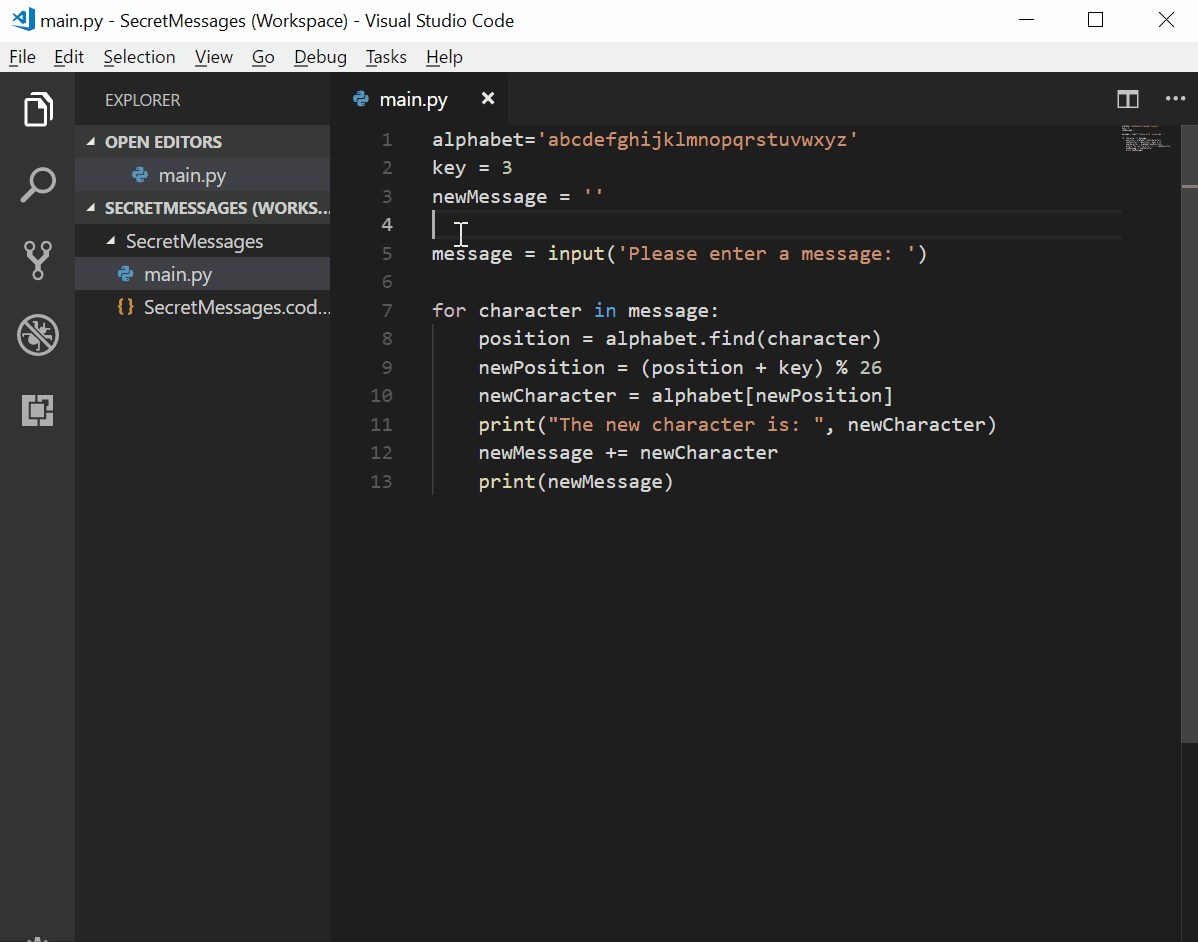
You need to change a couple of lines of your code to store the entire message instead of only one character, as it does now. Also, add a for loop to your code, and indent (four spaces before the beginning of each line) the rest of the code. This section of the code inside the loop will be repeated for each character in the message as shown below:
alphabet='abcdefghijklmnopqrstuvwxyz'
key = 3
newMessage = ''

message = input('Please enter a message: ')

for character in message:
    position = alphabet.find(character)
    newPosition = (position + key) % 26
    newCharacter = alphabet[newPosition]
    print("The new character is: ", newCharacter)
What happens when you run your program?
Time to finish your program to encrypt a message ;). To do that, add each encrypted character to your newMessage variable by adding the following lines to your code:
newMessage += newCharacter
print(newMessage)
Run your program, should look something like this:
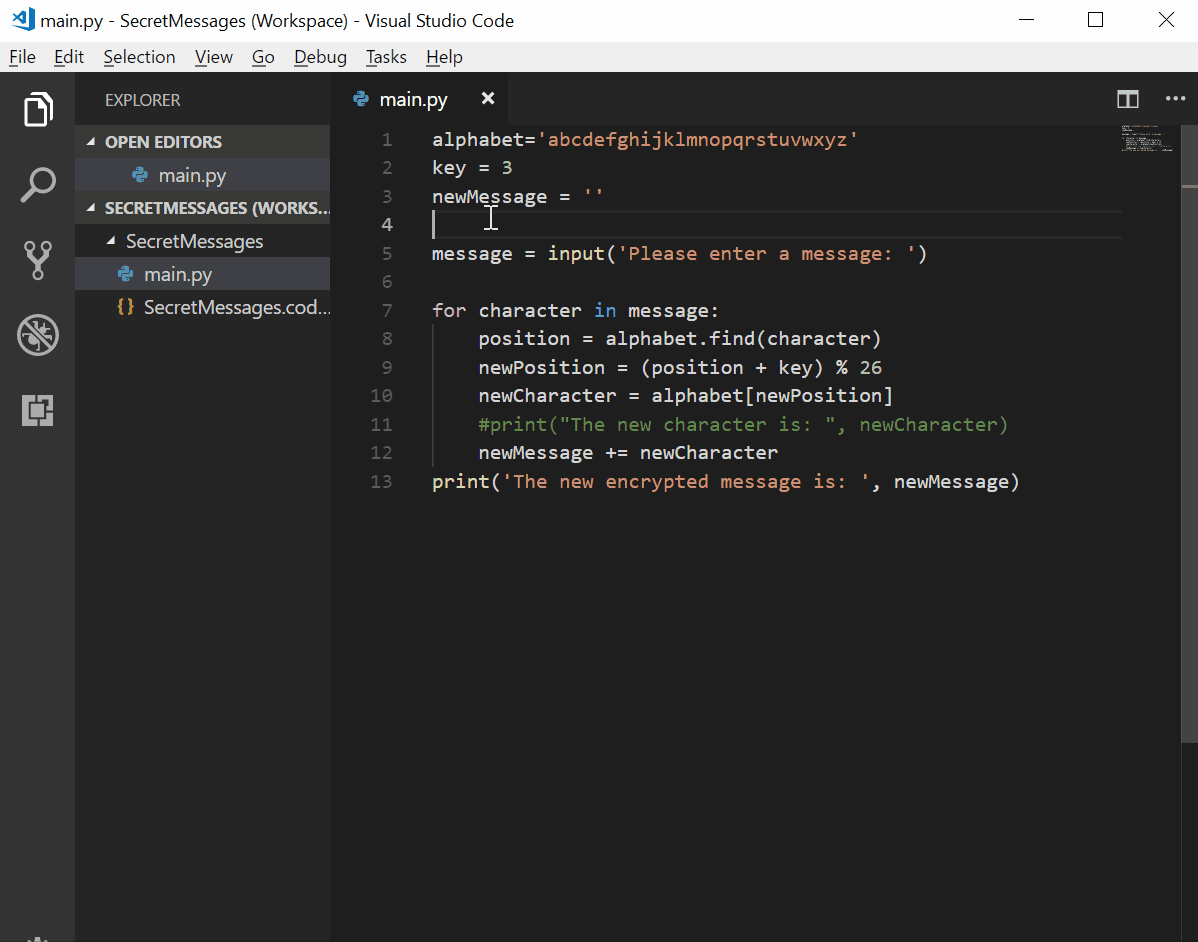
You will notice that every time the program is encrypting a character it is also printing part of the message on the screen. If you just want to see the final message, just delete the spaces before the last print statement. This way the encrypted message will only be displayed once at the end of the execution.
You can also delete the code for printing the character positions (or comment it by using the symbol # at the beggining of the line) and add to the last print statement a sentence that indicates that it corresponds to the new message. Like this:
alphabet='abcdefghijklmnopqrstuvwxyz'
key = 3
newMessage = ''

message = input('Please enter a message: ')

for character in message:
    position = alphabet.find(character)
    newPosition = (position + key) % 26
    newCharacter = alphabet[newPosition]
    #print("The new character is: ", newCharacter)
    newMessage += newCharacter
print('The new encrypted message is: ', newMessage)
Congratulations! Now you can encrypt messages to chat with your friends secretly using your own program in Python!
This is just the beginning! Now that you know how to encrypt some messages, make your own program to decrypt it.
Good luck and never stop learning, because learning is the ability to understand how everything around you works (and also how to encrypt and decrypt messages :) )
- Here you are a link to know more about Ciphers with Python
- Or if you like music and art
- Also, if you want to check out the first version of the course Introduction to Python" in this link you can do it. Enjoy it :)