
Home Assistant integration that follows the packages of an OmaPosti account.




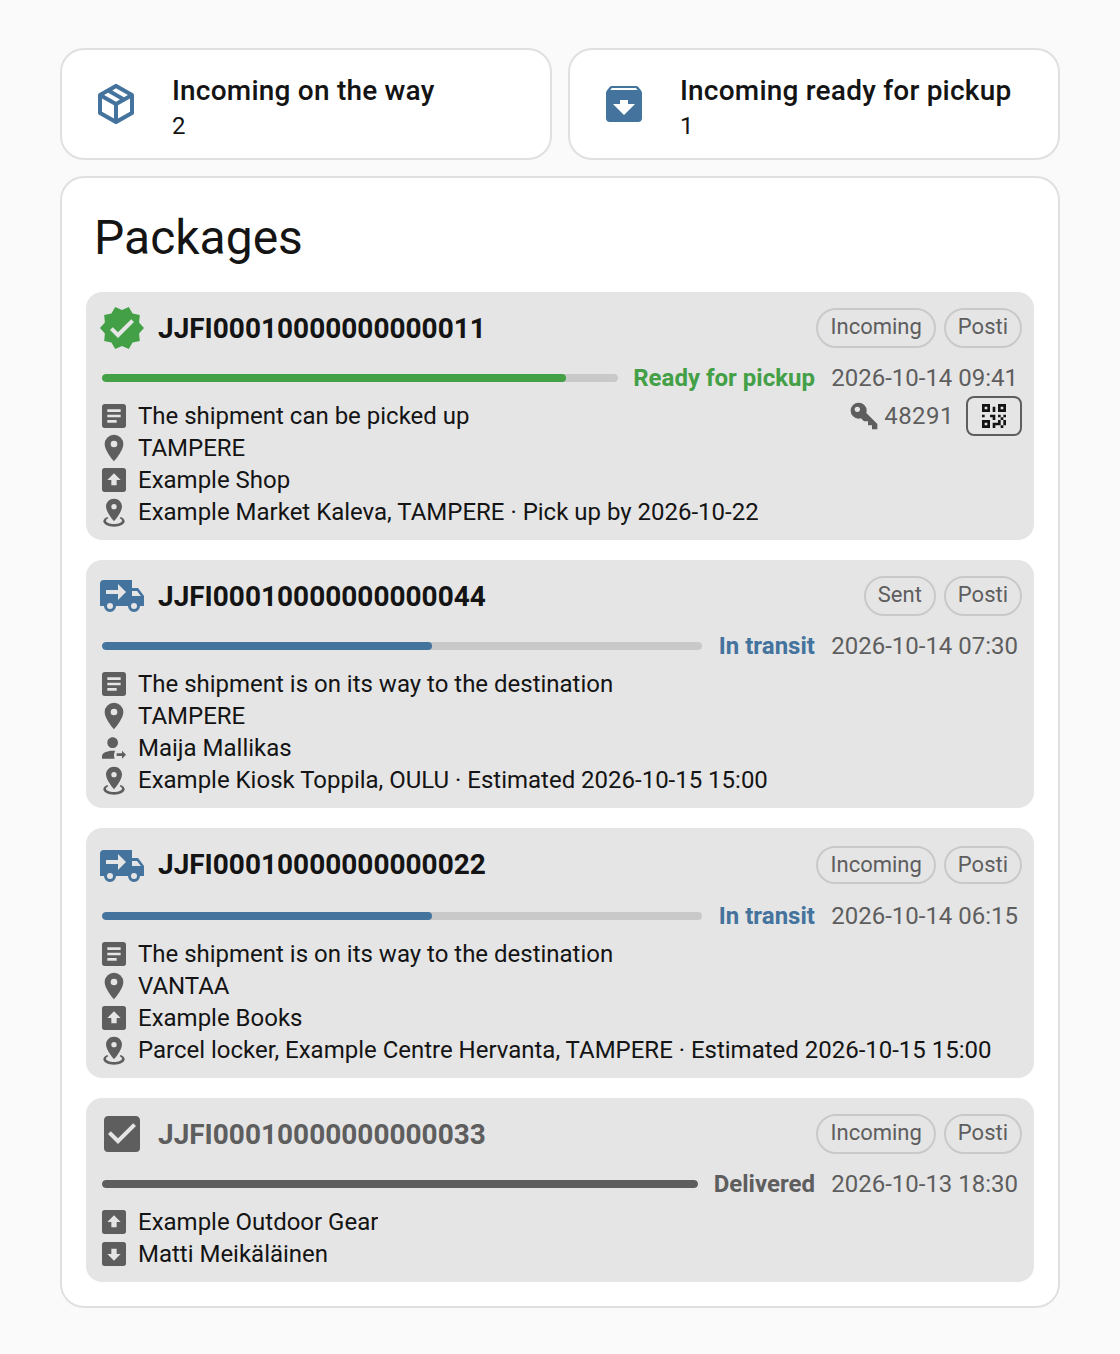
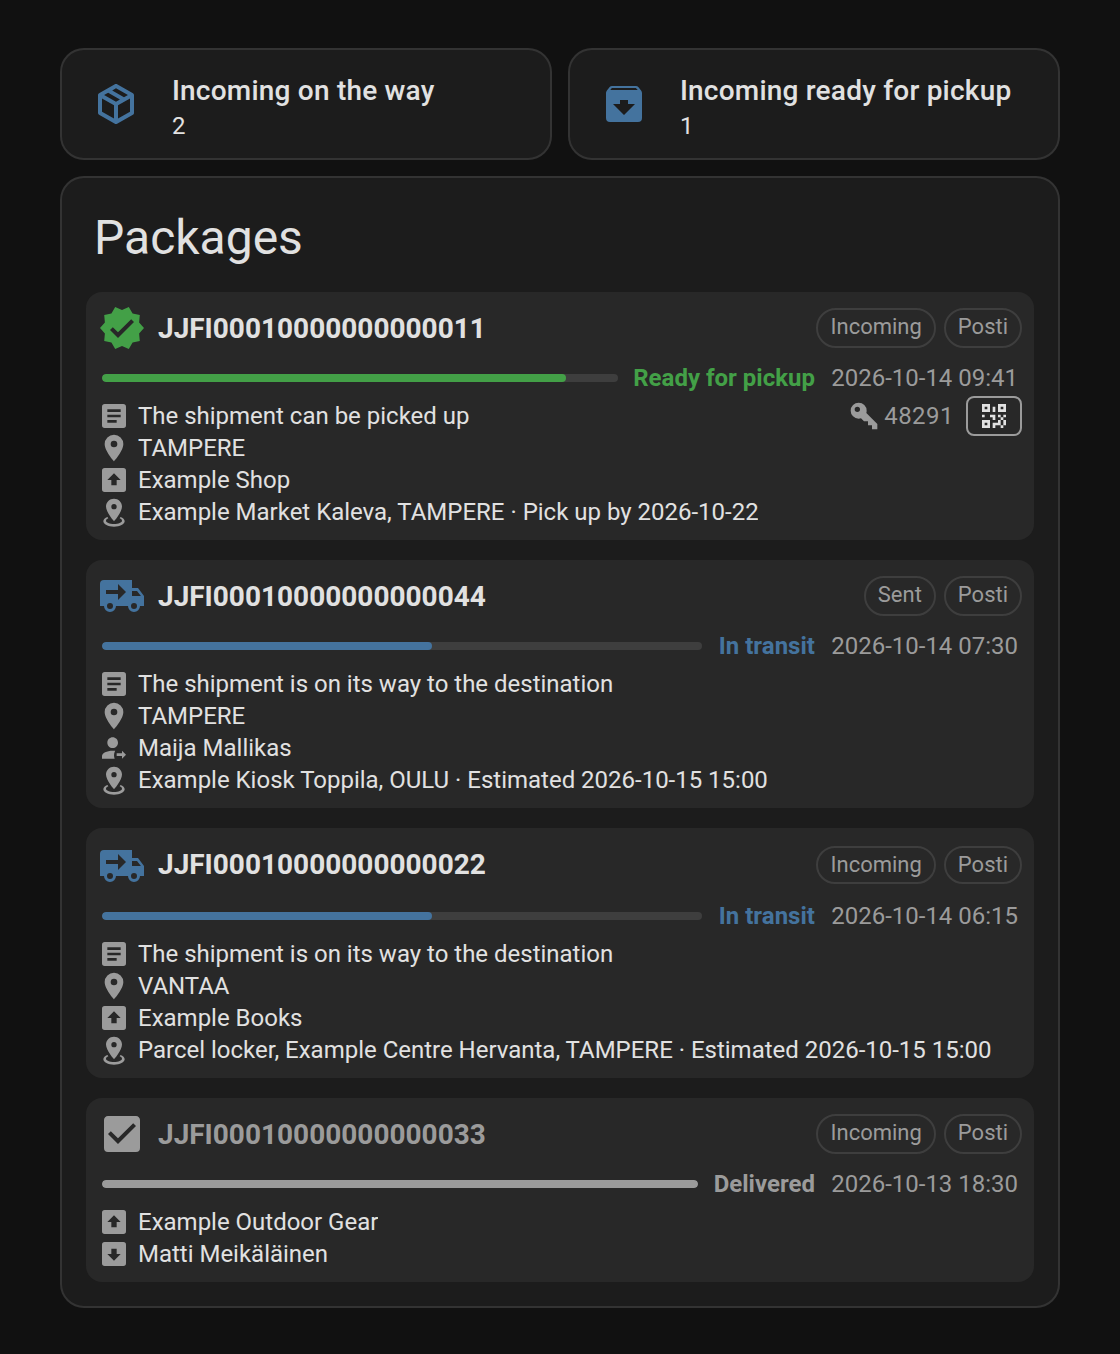
A custom component that lists the coming and recently delivered packages of an OmaPosti account, and those sent from it, telling the two apart. There's no need to add packages by hand. The list comes from the packages in your account, and it's updated every 10 minutes.
The sensor lists the packages in the format package-tracker-card reads, so the card can show them together with packages from other tracking integrations. Four more sensors count the packages coming to you and those you have sent, and an event entity fires when one of them moves along.
This is an unofficial integration. See Data for what that means.
- Add this repository to HACS custom repositories with type Integration
- Search for Posti package tracking in HACS and download it
- Restart Home Assistant
- Add the integration in Settings › Devices & services and log in (see Logging in)
- Download the source code from the latest release
- Copy the
custom_components/posti_trackingfolder to your Home Assistant installation'sconfig/custom_componentsfolder - Restart Home Assistant
- Add the integration in Settings › Devices & services and log in (see Logging in)
OmaPosti has no public API, and Posti no longer accepts a user name and password. The integration logs in the way the OmaPosti Android app does, with strong authentication, and then registers itself as one of your account's trusted devices, as the app does on a phone.
- Choose how you authenticate. The list is Posti's own, so it has Mobiilivarmenne, the banks, the ID card and whatever else Posti offers at the time.
- Open the link the integration shows and authenticate in your own browser, as you would on posti.fi.
- Your browser ends up on a page on
todentaminen.posti.fithat may show an error. That is expected. Copy the full address from the address bar and paste it into the integration.
The settings come next, and the device is registered only once you save them, so closing the dialog before that leaves nothing behind in your account.
The authentication happens entirely in your browser. Your bank credentials never reach Home Assistant or the integration. The only thing sent to Home Assistant is the address you paste.
After that the integration never needs your bank again. It keeps the login alive with its own device key, the way the app does, also over restarts and longer breaks. You need to log in again only if the device is removed from your account, and then Home Assistant asks for it on the integration page.
Because it imitates the app, a change in Posti's login can stop the integration until it is updated.
Read this before adding an account.
To stay logged in, the integration stores a private key of its own in Home Assistant, together with the latest tokens. That key lets it get new tokens for your OmaPosti account for as long as the device stays trusted, without your bank and without asking you. On a phone, the OmaPosti app keeps its key behind the phone's lock. Home Assistant has no such place, so the key sits in Home Assistant's configuration storage like any other integration's credentials, and in every backup of it.
So your OmaPosti account is only as safe as your Home Assistant installation. Anyone who can read its configuration or a backup of it can read your packages and the details in your account, such as your name and address, until the device is removed.
The integration shows in your account's trusted devices as Home Assistant.
- Deleting the account in Home Assistant removes that device from your account as well.
- Otherwise, remove it in the OmaPosti app, under More › Settings › Security settings › Manage trusted devices (in Finnish Lisää › Asetukset › Turva-asetukset › Luotettujen laitteiden hallinta). Do this if Home Assistant couldn't reach Posti when you deleted the account (it then logs a warning), if Home Assistant or a backup of it is lost or stolen, or if you stop using Home Assistant without deleting the account first.
Once the device is removed, the key stored in Home Assistant and its backups is useless. A token it already got keeps working until it expires, which is within an hour.
Each account is added separately. To change its settings later, choose Reconfigure from the account's menu on the integration page.
| Name | Type | Description | Default |
|---|---|---|---|
| Language | enum | Language of the package event descriptions, fi or en |
Home Assistant's language |
| Undelivered packages first | boolean | When there are more packages than the maximum, undelivered ones are listed first | on |
| Maximum number of incoming packages | number | How many incoming packages the sensor lists. 0 leaves them out altogether | 5 |
| Maximum number of sent packages | number | How many sent packages the sensor lists. 0 leaves them out altogether | 5 |
| Days until undelivered packages are hidden | days | Counted from the latest event. Some packages stay in delivery for good | 15 |
| Days until delivered packages are hidden | days | Counted from the delivery. Returned packages count as delivered | 3 |
| Pickup code | enum | Don't add, add, or add with a QR code | don't add |
The pickup code opens the locker, or collects the package at a counter, and anyone who can see your dashboard can read it. So it is left out unless Pickup code is set to Add or Add with a QR code. The locker door, or the shelf a counter keeps the package on, goes with the code. The pickup point itself is always included.
Posti gives these details only once a package is ready for pickup, in one of three ways, and the integration reads them as OmaPosti's own web app does:
- At a locker, a code typed in on its keypad, and the door the package is behind. At an outdoor locker Posti's number is the keypad to type the code on rather than a door, so it is left out. A locker needs no QR code.
- With a pickup code, the code shown at the counter, which is also what its QR code holds.
- At a counter shelf, a QR code of the package itself and the shelf it is on, with no code to type.
With Add with a QR code, a package collected with a pickup code or from a shelf carries what its QR code holds, which package-tracker-card can draw.
The state is the time a package of the account last changed, such as when it was received, moved or delivered. The
sensor is named after the account, for example sensor.posti_matti_meikalainen_example_com.
The packages attribute lists the packages, and each package has these keys.
| Key | Description |
|---|---|
shipment_number |
The tracking number, or Posti's shipment id without one |
status |
The package's status, below |
raw_status |
Posti's status, such as READY_FOR_PICKUP |
direction |
incoming, or outgoing for a package sent from the account |
origin |
The sender. Empty for a package you sent |
recipient |
Who a package you sent goes to |
destination, destination_city |
The pickup point, or where it is delivered, and the city |
latest_event |
The latest event, in the chosen language |
latest_event_city |
Where the latest event happened |
latest_event_date |
When the package last changed |
estimated_delivery |
When the package is expected, when Posti says |
pickup_deadline |
How long it is kept at the pickup point |
weight |
The package's weight in kilograms |
package_count |
How many parcels the shipment has |
pickup_point |
The pickup point, with name, street, postal_code, city, type and its opening hours as available |
pickup_point.compartment |
The locker door or the counter shelf, when the code is added. None at an outdoor locker |
pickup_code |
The code that opens the locker or collects the package, when it is added |
pickup_qr |
What the package's QR code holds, with Add with a QR code |
source |
Always Posti |
tracking_url |
The package's page on posti.fi |
origin_city, shipment_date and latest_event_country are always empty, as Posti doesn't tell them. They are in
the list so that packages look the same as other integrations' do.
status |
Meaning | Posti's status |
|---|---|---|
1 |
Waiting | WAITING, ORDER_RECEIVED |
2 |
Received by Posti | RECEIVED |
3 |
In transport | IN_TRANSPORT |
4 |
In delivery | IN_DELIVERY |
5 |
Ready for pickup | READY_FOR_PICKUP |
0 |
Delivered | DELIVERED |
6 |
Returned to the sender | Any RETURN_ status of a package you received, and RETURN_DELIVERED of one you sent |
7 |
Unknown | any other status |
A package you sent that comes back to you is incoming while it does, since it is on its way to you. It goes through
the statuses again, so that it counts, fires its events and shows like any package you are to collect, and its
raw_status keeps the RETURN_ prefix. Its delivery back is 6.
Times are ISO 8601 in UTC. Packages without events, which Posti has only been told about, aren't listed. The packages aren't stored in the recorder, only the state. The sensor is unavailable while Posti can't be reached.
Four sensors count the packages, so a badge or an automation needs no templating. They count every package of the account within the days set above, also those the list has no room for.
| Sensor | What it counts |
|---|---|
| Incoming on the way | Incoming packages that haven't finished their journey |
| Incoming ready for pickup | Incoming packages waiting at a pickup point |
| Sent on the way | Packages sent from the account that haven't finished their journey |
| Sent ready for pickup | Sent packages waiting for the recipient at a pickup point |
An event entity, Package, fires once for everything that happens to a package, so an automation can act on it
without watching the packages attribute. Several packages changing in one update fire one event each, packages the
list has no room for included. A new package that is already ready for pickup, delivered or returned when it is first
seen fires new_package and then that status's event, so an automation listening for either hears of it. Packages
sent from the account fire events too, with direction set to outgoing, so an automation about your own parcels
leaves them out with a condition, as in the example below.
| Event type | When it fires |
|---|---|
new_package |
A package the account hadn't seen before |
moved |
The package moved along, or a new event of it |
ready_for_pickup |
It is waiting to be picked up |
delivered |
It has been delivered |
returned |
It was returned to the sender |
The event carries the package it happened to, with shipment_number, status, raw_status, direction, origin,
destination, destination_city, latest_event, latest_event_city, latest_event_date and source.
Nothing fires for the packages that are already there when Home Assistant starts, or when the integration is reloaded, since they have not just happened. A change while Home Assistant was off fires nothing either. A package missing from one of Posti's answers and back in the next is compared with how it was, not reported as new.
A notification for every package that can be picked up, leaving out the ones sent from the account. The trigger
watches every event, not only a change of its type, so the second package ready in a row isn't missed. queued keeps
the events of one update from being dropped.
automation:
  - mode: queued
    triggers:
      - trigger: state
        entity_id: event.posti_matti_meikalainen_example_com_package
        not_from: unavailable
        not_to:
          - unavailable
          - unknown
    conditions:
      - condition: state
        entity_id: event.posti_matti_meikalainen_example_com_package
        attribute: event_type
        state: ready_for_pickup
      - condition: not
        conditions:
          - condition: state
            entity_id: event.posti_matti_meikalainen_example_com_package
            attribute: direction
            state: outgoing
    actions:
      - action: notify.mobile_app_phone
        data:
          message: "{{ trigger.to_state.attributes.shipment_number }} is ready for pickup"
The packages on a dashboard, with the codes revealed when clicked:
type: custom:package-tracker-card
title: Packages
entity: sensor.posti_matti_meikalainen_example_com
pickup_code: toggleThe integration now reads the service OmaPosti's web app uses, which tells a package you sent from one coming to you. Nothing needs doing for it.
The one Maximum number of packages became two, one for incoming packages and one for sent ones. Both take the
number the account had. Packages on the way and Packages ready for pickup are now Incoming on the way and
Incoming ready for pickup, and no longer count packages sent from the account, which have sensors of their own.
Their entity IDs stay as they were. Events of sent packages still fire, now with direction. Add the condition in the
example above to an automation that should leave them out.
Posti no longer tells a package's sender city, when it was added to the account, or the country of its events, so those keys are empty. It now tells how long a package is kept at the pickup point.
The pickup point's type is now one of Posti's newer types, LOCKER, LOCKER_OUTDOOR, LOCKER_PRIVATE,
POSTI_SERVICE_POINT or UNKNOWN, rather than POSTI, NOUTOPISTE, SMARTPOST or MUSE_LOCKER. Its available is
the opening hours as one line made by the integration, such as ma-pe 7.00 - 21.00, la 10.00 - 18.00. A package
without a tracking number has Posti's newer shipment id as its shipment_number. A template that compares any of these
needs updating.
Since 3.1, the pickup point is always included, and the Pickup point and code switch became the Pickup code choice. An account that had the switch on gets Add, and one that had it off gets Don't add. To get QR codes as well, choose Add with a QR code with Reconfigure.
From 2.x or 1.x, Posti no longer accepts passwords, so every account has to log in once with strong authentication. After the upgrade Home Assistant asks for it in Settings › Repairs and on the integration page. Open it there and follow Logging in. The saved password is deleted at the upgrade.
The sensors, the event entity, their entity IDs and the other settings all carry over.
Package data comes from Posti Group Oyj, from the same service OmaPosti's web app uses.
This is an unofficial integration. It isn't affiliated with or endorsed by Posti. Each user logs in with their own OmaPosti account, and using it may be against Posti's terms of service, so use it at your own risk. It will be withdrawn if Posti objects.
The integration's texts are in custom_components/posti_tracking/translations/, one JSON file per language, named by
its language code, such as en.json and fi.json. To add a language, copy en.json to the new language's code and
translate the values.
Requires Python 3.14, the version the current Home Assistant needs.
python3.14 -m venv .venv
.venv/bin/pip install -r requirements_test.txt
.venv/bin/ruff check . && .venv/bin/ruff format --check . && .venv/bin/pytest
| Path | What it contains |
|---|---|
__init__.py |
Setup, removal, and moving entries of earlier versions |
config_flow.py |
Adding an account, logging in again and changing settings |
login.py |
Strong authentication like the OmaPosti app |
device.py |
The device key, its registration and renewing the tokens |
api.py |
The shipments query, renewing the tokens when they expire |
coordinator.py |
Fetching the packages every 10 minutes |
shipments.py |
Turning shipments into the sensor's packages |
sensor.py |
The sensors, the account's own and the counts |
event.py |
The event entity, one event per package change |
changes.py |
What happened to the packages between two updates |
translations/<language>.json |
Home Assistant UI texts |
docs/screenshots.json |
The made-up data the README's image is taken from |
Hey dude! Help me out for a couple of 🍻 or a ☕!

MIT, see LICENSE.